
1999-26 Ford F250/350 8x170 Ford Hub Centric Wheel Spacer (SOLD INDIVDUALLY)
SI8170
AMERICAN MADE AND A LIMITED LIFETIME WARRANTY!
Availability: **DUE TO HIGH DEMAND, PRODUCTION TIME MAY BE UPTO 10-15 BUSINESS DAYS BEFORE SHIPPING**
PLEASE KEEP THS IN MIND WHEN ORDERING. WE WILL NOT BE ABLE TO CANCEL/REFUND YOUR ORDER IF YOU CHOSE TO DISREGARD THE STATED PRODUCTION TIME.
Pricing:
$0.00
Description
SOLD INDIVIDUALLY!!! THIS LISTING IS FOR A SINGLE WHEEL SPACER.
**DUE TO INCREASED DEMAND, CURRENT PRODUCTION TIME BEFORE SHIPPING COULD BE 10-15 BUSINESS DAYS**
12 Bolt Diff cover = Sterling
14 Bolt Diff cover = DANA m275
16 Bolt Diff cover = Sterling 11.6 will have NO LIP due to hub length and diameter. With the Lip, minor grinding on the Axle Flange cap WILL BE REQUIRED!
AMERICAN MADE AND A LIMITED LIFETIME WARRANTY!
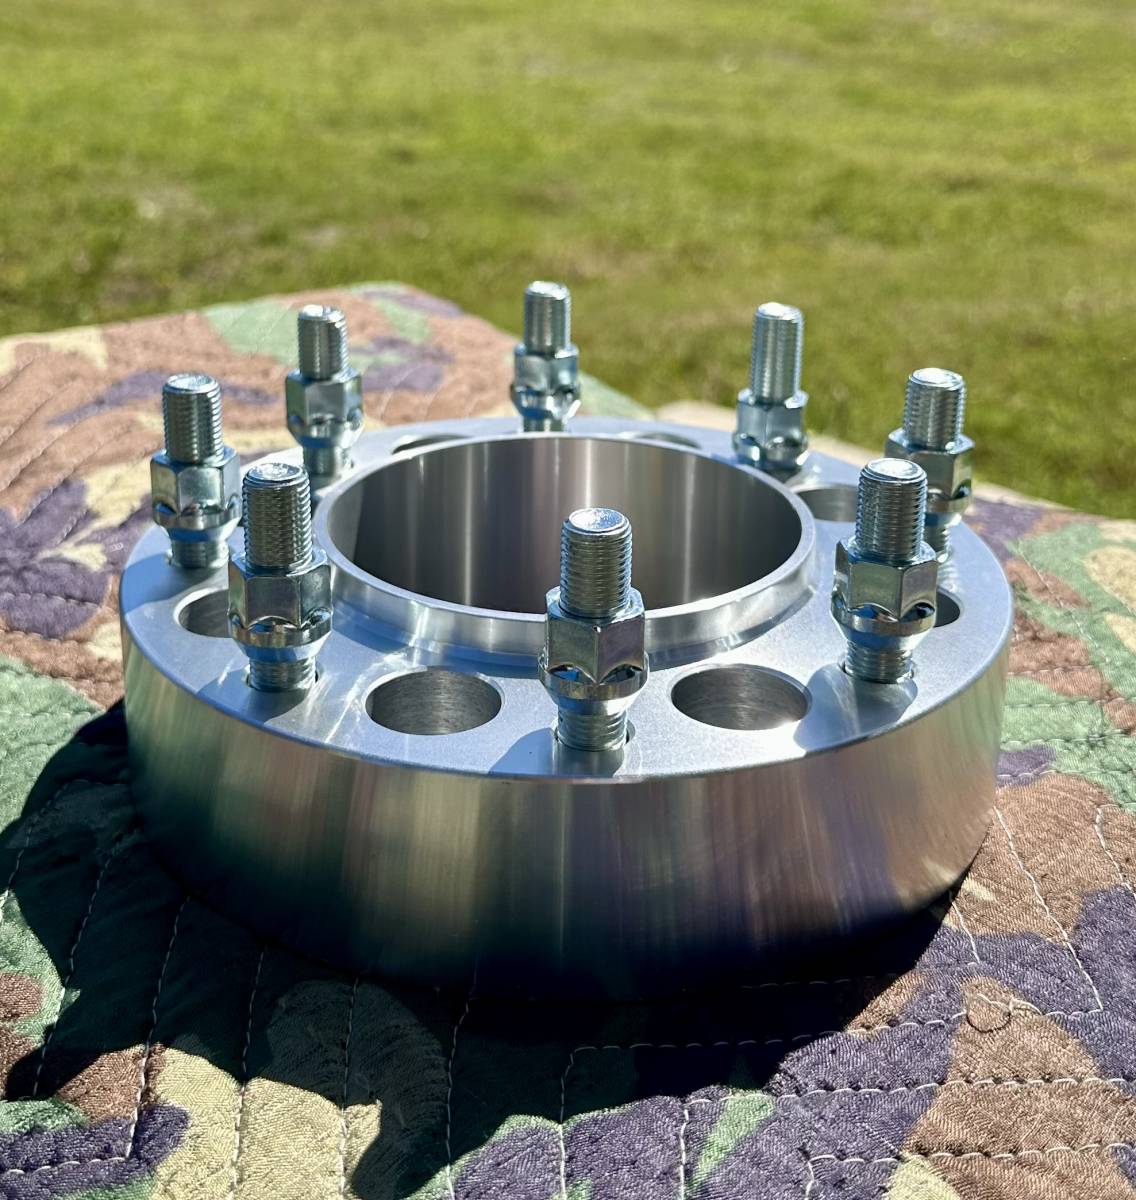
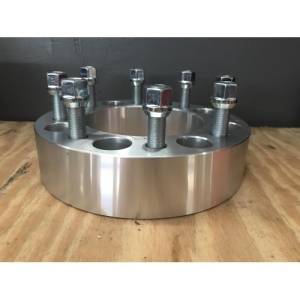
These FORGED ALUMINUM hub centric wheel spacers are designed for Ford F-250/350 running hub piloted wheels with Flange style lug nuts. They will also work with aftermarket lug centric wheels, but are NOT required because aftermarket wheels in most cases have a larger center bore for ease of fitment and a larger amount of applications.
1.5" and 2" may require trimming OEM wheel studs to avoid contact with the backpad of the wheel. CHECK WITH A STRAIGHT EDGE BEFORE INSTALLING WHEEL. IT IS 100% UP TO THE INSTALLER/END USER TO CHECK THIS. IF THE STUDS ON THE HUB PROTRUDES PAST THE FACE OF THE SPACER, IT WILL EVENTUALLY CAUSE A FAILURE! If stud pockets are in the backpad of the wheel, trimming generally would not be required!
If you are unsure of which rear axle you have here is an easy way to tell. The Dana M275 is only optioned in 2017 and new trucks with the HD Towing Package. if you have a 99-16 Truck it will have a Sterling rear axle.
2017+ Truck owners, 350 Single wheels are standard with the Dana. F250, it is an option with the HD Tow Package. For you the easiest way to tell is to count the diff cover bolts.
12 Bolt Diff cover = Sterling
14 Bolt Diff cover = DANA m275
16 Bolt Diff cover = Sterling 11.6
This spacer is machined precisely for the Ford Sterling or Dana M275 Hub and will require cleaning the rear but from any dirt, debris, or rust scale build up. In some cases, minor sanding/grinding may be required. Failure to do so can cause a snug fit or lead you to believe it will not fit.
For the Dana M275, Due to the large diameter and length of this rear axle hub, the protruding hub centric lip is machined extremely thin to clear the OD of the Hub. Because of this, the hub centric lip is machined to approximately 1mm thin overall and may require a little more patience and mechanical ability than your average wheel spacer to install but is nothing someone with basic mechanic abilities and common sense can not handle. We just want to simply forewarn you that it may not just fall in place and if it does not, please do not just beat in on with a hammer.
*IF YOU LACK PATIENCE OR BASIC MECHANICAL ABILITY PLEASE HAVE THEM PROFESSIONALLY INSTALLED BY SOMEONE CAPABLE*
*IF YOUR TRUCK IS A DUAL REAR WHEEL THIS IS NOT THE CORRECT SPACER! FORD DUAL REAR WHEEL TRUCKS HAVE BEEN 8x200 SINCE 2005."
Installation Instructions
FAILURE TO FOLLOW INSTRUCTIONS COULD RESULT IN DAMAGE TO
WHEEL ADAPTERS/SPACERS AND VEHICLE STUDS.
IT IS IMPORTANT TO FOLLOW EACH STEP OF THESE INSTRUCTIONS. IF YOU HAVE ANY
QUESTIONS DURING OR BEFORE INSTALLATION, PLEASE CONTACT US.
Please follow instructions and proper safety procedures. Use jack stands, set parking brake,
block wheels; wear eye protection, etc. . . .
1. Remove wheel.
2. Clean surface of hub/rotor or drum where adapter or spacer is going to be mounted. Use a wire brush. Surface must be
clean so that adapter or spacer sits perfectly flat on mounting surface. In some vehicle models rotor retainer clips must
be removed to allow adapter or spacer to sit flat.
3. Install adapter or spacer by finger tightening open end 60 degree lug nuts. Using a calibrated torque wrench, dry torque
in a star pattern to your vehicle manufacturer's specifications. Check your owner's manual for dry torque specifications.
(Note for 8 lug installation: Do not exceed 130 ft. lbs. dry torque value.) DO NOT USE IMPACT GUN. An
impact gun may damage lug nuts and/or studs.
4. Once the adapter or spacer is installed, check the surface of the adapter or spacer. IN MOST CASES, STUDS OR
LUG NUTS SHOULD NOT PROTRUDE BEYOND WHEEL MOUNTING SURFACE OF THE ADAPTER
OR SPACER. If you have any questions about your particular application, please contact us.
5. Install wheel by finger tightening lug nuts and torque in a star pattern to manufacturer's specifications. Use a torque
wrench. Do not force lug nuts on. Be sure your lug nuts are deep enough to tighten the wheel down without
bottoming out.
6. Drive vehicle for 10 miles, remove wheel and check the torque of the adapter or spacer. If re-torqueing is needed, repeat
step 6 until spacer is not in need of re-torqueing. Do this as many times as necessary for adapters or spacers to seat
properly. Check torque again at 100 miles. Failure to follow these steps can cause damage to the adapter or spacer
and/or studs.
7. Once the adapter or spacer is properly torqued and the wheel does not have to be removed, check the torque of the
wheel every 10 miles until re-torqueing is not needed.
IMPORTANT NOTE: It is the vehicle owner and/or operator's responsibility to properly install, periodically inspect, and maintain installed products including
lug nuts to ensure that they are in satisfactory working order & within manufacturer’s specifications.
IF YOU HAVE ANY QUESTIONS DURING OR BEFORE INSTALLATION, PLEASE CONTACT US.
**DUE TO INCREASED DEMAND, CURRENT PRODUCTION TIME BEFORE SHIPPING COULD BE 10-15 BUSINESS DAYS**
12 Bolt Diff cover = Sterling
14 Bolt Diff cover = DANA m275
16 Bolt Diff cover = Sterling 11.6 will have NO LIP due to hub length and diameter. With the Lip, minor grinding on the Axle Flange cap WILL BE REQUIRED!
AMERICAN MADE AND A LIMITED LIFETIME WARRANTY!
These FORGED ALUMINUM hub centric wheel spacers are designed for Ford F-250/350 running hub piloted wheels with Flange style lug nuts. They will also work with aftermarket lug centric wheels, but are NOT required because aftermarket wheels in most cases have a larger center bore for ease of fitment and a larger amount of applications.
1.5" and 2" may require trimming OEM wheel studs to avoid contact with the backpad of the wheel. CHECK WITH A STRAIGHT EDGE BEFORE INSTALLING WHEEL. IT IS 100% UP TO THE INSTALLER/END USER TO CHECK THIS. IF THE STUDS ON THE HUB PROTRUDES PAST THE FACE OF THE SPACER, IT WILL EVENTUALLY CAUSE A FAILURE! If stud pockets are in the backpad of the wheel, trimming generally would not be required!
If you are unsure of which rear axle you have here is an easy way to tell. The Dana M275 is only optioned in 2017 and new trucks with the HD Towing Package. if you have a 99-16 Truck it will have a Sterling rear axle.
2017+ Truck owners, 350 Single wheels are standard with the Dana. F250, it is an option with the HD Tow Package. For you the easiest way to tell is to count the diff cover bolts.
12 Bolt Diff cover = Sterling
14 Bolt Diff cover = DANA m275
16 Bolt Diff cover = Sterling 11.6
This spacer is machined precisely for the Ford Sterling or Dana M275 Hub and will require cleaning the rear but from any dirt, debris, or rust scale build up. In some cases, minor sanding/grinding may be required. Failure to do so can cause a snug fit or lead you to believe it will not fit.
For the Dana M275, Due to the large diameter and length of this rear axle hub, the protruding hub centric lip is machined extremely thin to clear the OD of the Hub. Because of this, the hub centric lip is machined to approximately 1mm thin overall and may require a little more patience and mechanical ability than your average wheel spacer to install but is nothing someone with basic mechanic abilities and common sense can not handle. We just want to simply forewarn you that it may not just fall in place and if it does not, please do not just beat in on with a hammer.
*IF YOU LACK PATIENCE OR BASIC MECHANICAL ABILITY PLEASE HAVE THEM PROFESSIONALLY INSTALLED BY SOMEONE CAPABLE*
*IF YOUR TRUCK IS A DUAL REAR WHEEL THIS IS NOT THE CORRECT SPACER! FORD DUAL REAR WHEEL TRUCKS HAVE BEEN 8x200 SINCE 2005."
Installation Instructions
FAILURE TO FOLLOW INSTRUCTIONS COULD RESULT IN DAMAGE TO
WHEEL ADAPTERS/SPACERS AND VEHICLE STUDS.
IT IS IMPORTANT TO FOLLOW EACH STEP OF THESE INSTRUCTIONS. IF YOU HAVE ANY
QUESTIONS DURING OR BEFORE INSTALLATION, PLEASE CONTACT US.
Please follow instructions and proper safety procedures. Use jack stands, set parking brake,
block wheels; wear eye protection, etc. . . .
1. Remove wheel.
2. Clean surface of hub/rotor or drum where adapter or spacer is going to be mounted. Use a wire brush. Surface must be
clean so that adapter or spacer sits perfectly flat on mounting surface. In some vehicle models rotor retainer clips must
be removed to allow adapter or spacer to sit flat.
3. Install adapter or spacer by finger tightening open end 60 degree lug nuts. Using a calibrated torque wrench, dry torque
in a star pattern to your vehicle manufacturer's specifications. Check your owner's manual for dry torque specifications.
(Note for 8 lug installation: Do not exceed 130 ft. lbs. dry torque value.) DO NOT USE IMPACT GUN. An
impact gun may damage lug nuts and/or studs.
4. Once the adapter or spacer is installed, check the surface of the adapter or spacer. IN MOST CASES, STUDS OR
LUG NUTS SHOULD NOT PROTRUDE BEYOND WHEEL MOUNTING SURFACE OF THE ADAPTER
OR SPACER. If you have any questions about your particular application, please contact us.
5. Install wheel by finger tightening lug nuts and torque in a star pattern to manufacturer's specifications. Use a torque
wrench. Do not force lug nuts on. Be sure your lug nuts are deep enough to tighten the wheel down without
bottoming out.
6. Drive vehicle for 10 miles, remove wheel and check the torque of the adapter or spacer. If re-torqueing is needed, repeat
step 6 until spacer is not in need of re-torqueing. Do this as many times as necessary for adapters or spacers to seat
properly. Check torque again at 100 miles. Failure to follow these steps can cause damage to the adapter or spacer
and/or studs.
7. Once the adapter or spacer is properly torqued and the wheel does not have to be removed, check the torque of the
wheel every 10 miles until re-torqueing is not needed.
IMPORTANT NOTE: It is the vehicle owner and/or operator's responsibility to properly install, periodically inspect, and maintain installed products including
lug nuts to ensure that they are in satisfactory working order & within manufacturer’s specifications.
IF YOU HAVE ANY QUESTIONS DURING OR BEFORE INSTALLATION, PLEASE CONTACT US.
Details
- SI8170
- SI8170
- Shifted Industries
- **DUE TO HIGH DEMAND, PRODUCTION TIME MAY BE UPTO 10-15 BUSINESS DAYS BEFORE SHIPPING** PLEASE KEEP THS IN MIND WHEN ORDERING. WE WILL NOT BE ABLE TO CANCEL/REFUND YOUR ORDER IF YOU CHOSE TO DISREGARD THE STATED PRODUCTION TIME.
- New
Shipping Information
- Item Requires Shipping
- 8.0 lbs.
Customer Reviews
 Total Reviews (1)
You must login to post a review.
Reviewed by: Shane04/04/2022 12:47AM
Product ownership: A year or longer
Purchased from: Shifted Industries
Comments:
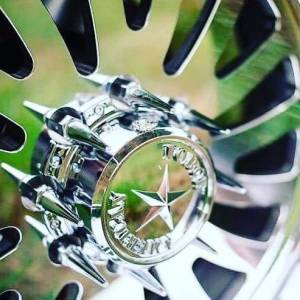
I have had these spacers for about a year on (24x14)and have had no issues with these at all,Good quality.Have had wheels off numerous times and spacer/theads still look new(Also running their Spiked Lug Nuts). Friendly people and fast shipping!
(Highly Recommend)